This quick guide explains how to perform a sanctions list check for a customer in Microsoft Dynamics 365 Business Central. The structure is fundamentally identical for all supported entities (e.g., vendor, contact, employee) and can be applied according to this quick guide.
Prerequisites
- Microsoft Dynamics 365 Business Central 2021 release wave 1 (18.0) or newer.
Step 1: Install 365 business Sanction Screen
Open the Extension Marketplace in Microsoft Dynamics 365 Business Central and search for 365 business Sanction Screen. Install the app from Microsoft AppSource and wait for the installation to complete.
Step 2: Sanctions Check Results
After installing 365 business Sanction Screen in Microsoft Dynamics 365 Business Central, you can perform the sanctions list check for customers, vendors, etc. The entity is checked for possible matches with the sanctions lists and the results are displayed.
Additionally, you will find the Sanctions Check view in the info area of the card views, which gives you an overview of the checks performed and possible hits.
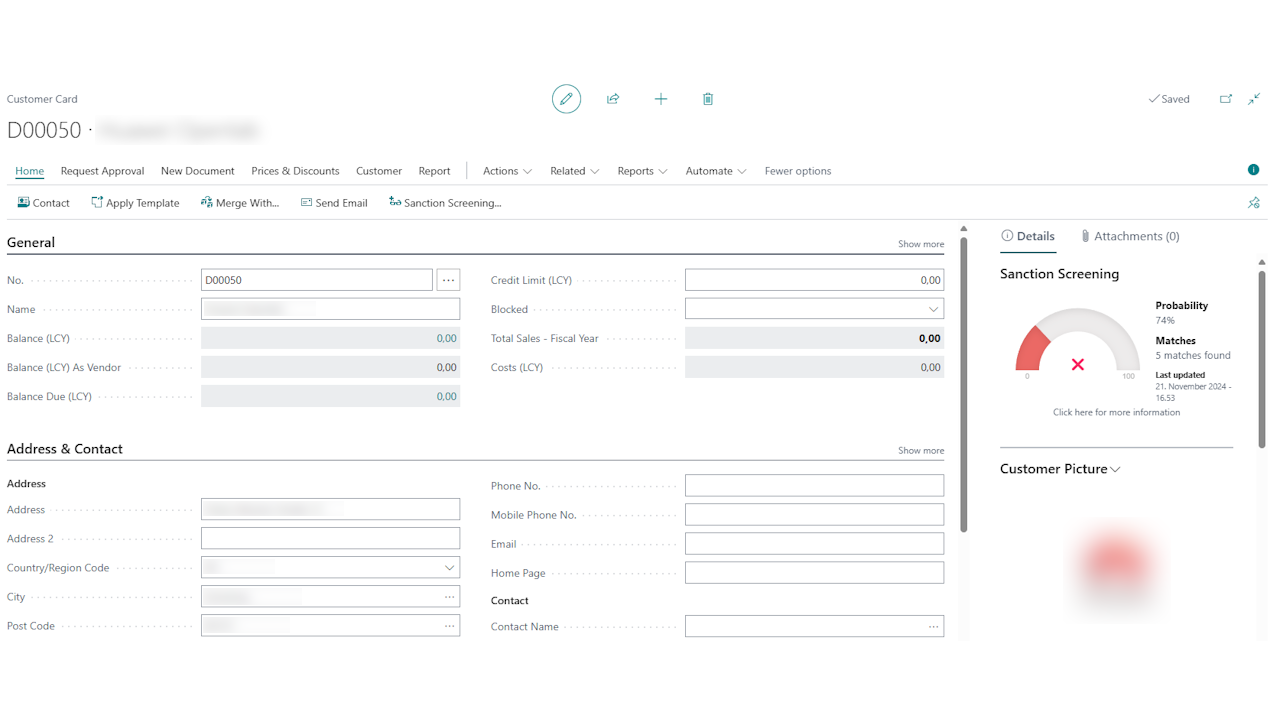
Sanctions Check Results - Possible Hits Found
If possible hits were found during the sanctions check, the following will be displayed in the info box:

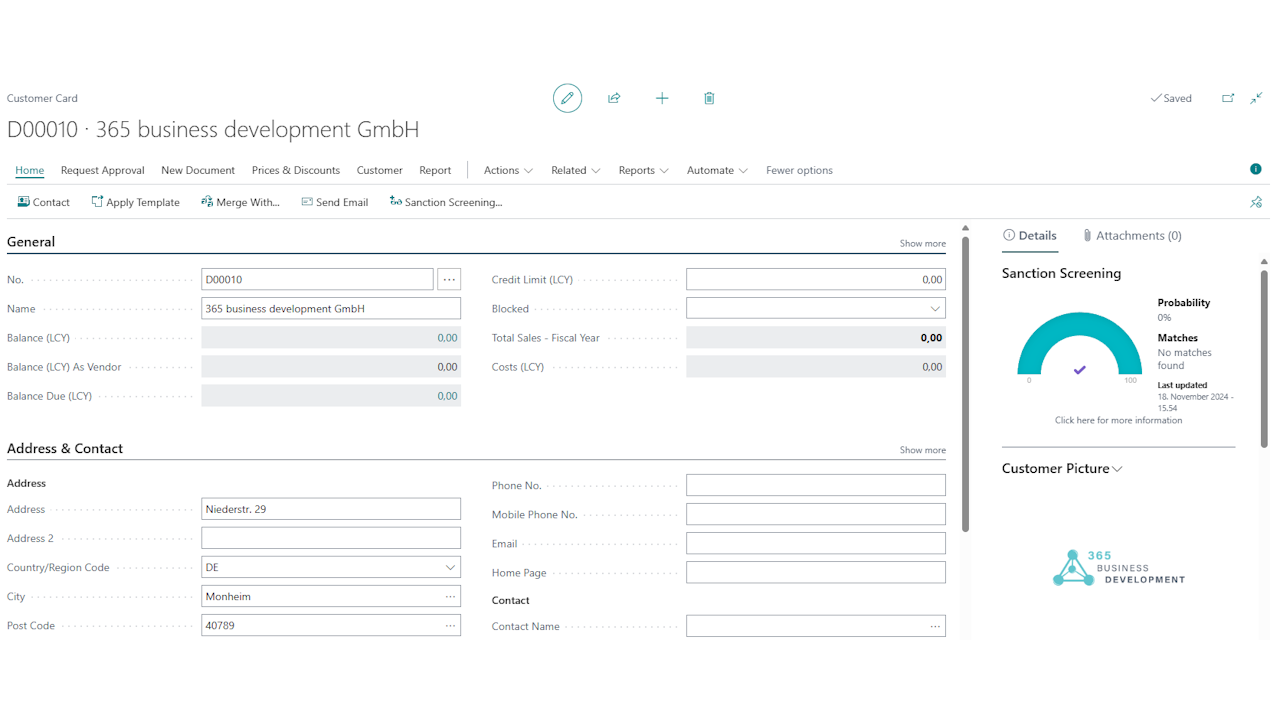
Sanctions Check Results - No Hits Found
If no hits were found during the sanctions check, the following will be displayed in the info box:

Step 3: Perform Sanctions List Check for a Customer
- Open the Customers page in Microsoft Dynamics 365 Business Central.
- Select the desired Customer.
- Select the action Sanctions Check….

In this case, no further action is necessary.
Step 2.1: Review Sanctions List Hits
- If possible matches were found, the following message will appear:

Select OK to review the possible matches. - On the Sanction Hit Entries page, the possible matches will be displayed.
- Select the Sanction Hit to get more information.
Step 2.2: Process Sanctions List Hits
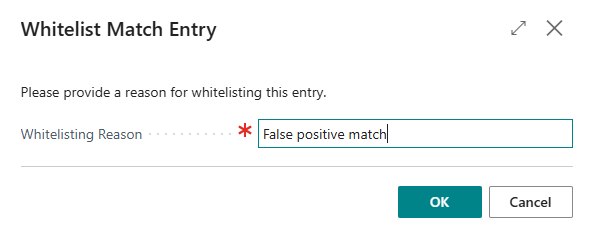
- If the sanction hit is a false match, select the action Add Hit to Whitelist….
- On the Add Hit to Whitelist page, you can add the sanction hit entry to the whitelist to avoid future matches. You must provide a reason and confirm the action with OK.

