

Install Print Agent Service on Windows
Prerequisites
- Operating system
- Windows 10 or newer (64-bit)
- Windows Server 2016 or newer (64-bit)
- .NET 8.0
- Internet connection
- 365 business Print Agent Service Installer
Good to know
If you use the Print Agent in the Direct Connection, make sure that the service port is accessible from your Dynamics 365 Business Central tenant.
For SaaS environments, we strongly recommend the use of Print Agent Cloud.
Info
To update your Print Agent Service download the current version and install it - your previous settings will be retained.
Before you start
Please read the article to find out how to choose the right connection type for your scenario.
Good to know
Enabling network printers can lead to timeouts, as the response times over the network are longer.
This behavior is a limitation of Windows printer management and cannot be completely circumvented by the 365 business Print Agent.
Recommendation: Install the Print Agent directly on the print server and share locally installed printers there - instead of accessing shared printers from a remote server.
Installing the Print Agent Service
- Download the current version.
- Save the ZIP file on the system that is to serve as Print Server with 365 business Print Agent.
- Unzip the content of the ZIP-file (e.g.
C:\install) - Run the setup file and follow the installation instructions.
Assisted Setup on first start
A configuration wizard will automatically start when you first open the application:
- Start the 365 business Print Agent application.
- The 365 business Print Agent Configuration Wizard will launch automatically.
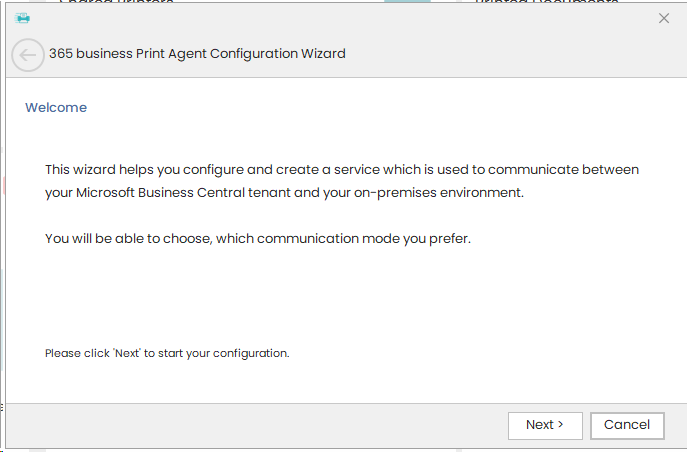
- Click Next.
- Choose your preferred connection type (see service mode).
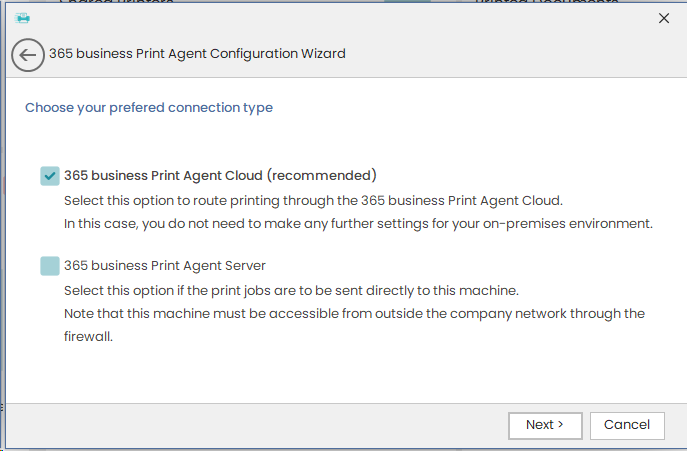
- Click Next.
- Paste the Tenant-ID copied from Print Agent Setup page in Microsoft Dynamics 365 Business Central.
- Enter a name to identify the client device.
- Click Next.
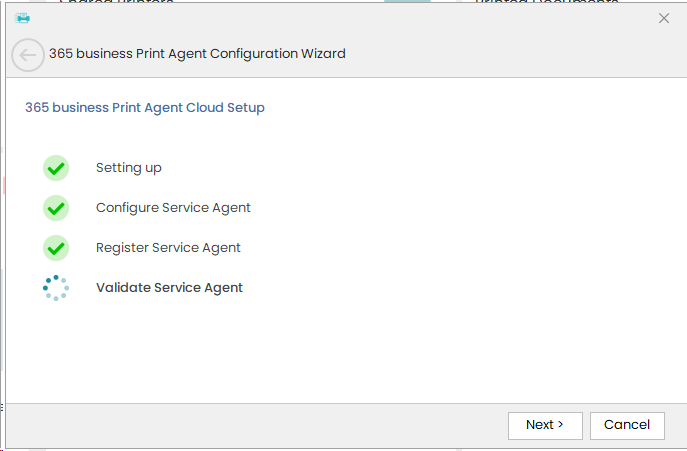
- Windows Service will be created, configured, and connected to your tenant.
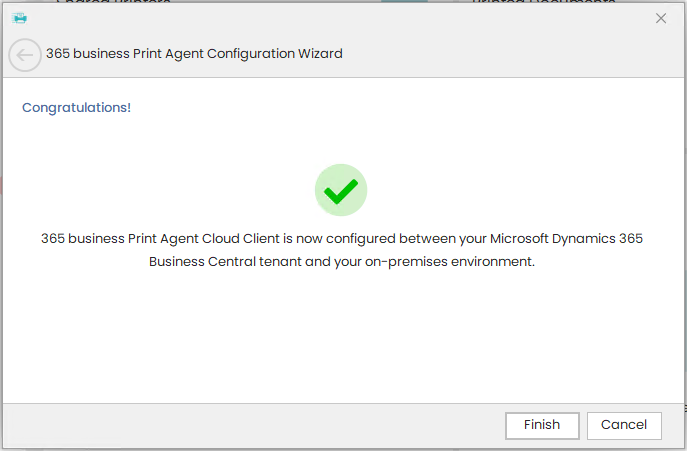
- Click Finish.
Changing the Connection Mode
The following explains how to change the connection type later.
Setup: Print Agent Cloud (Recommended)
To connect Print Agent Service and your Microsoft Dynamics 365 Business Central tenant in Print Agent Cloud you need to specify the Tenant ID from Print Agent Setup page in Microsoft Dynamics 365 Business Central. See here for additional information.
- Start the 365 business Print Agent application.
- Select Settings.
- Select 365 business Print Agent Cloud (recommended).
- Paste the Tenant-ID copied from Print Agent Setup page in Microsoft Dynamics 365 Business Central.
- Enter a name to identify the client device.
- Select Apply to set up the agent and start the service.
Setup: Direct Connection
Info
Ensure that the service URL and port are reachable from your Dynamics 365 Business Central environment.
For SaaS, we recommend using the Print Agent Cloud Mode.
- Start the 365 business Print Agent application.
- Select Settings.
- Select 365 business Print Agent Server.
- Specify the Remote Address where the Print Agent Service should bind, or leave an asterisk to bind to all available IP addresses on your system.
- Specify the Port the Print Agent Service should listen on (default port
60000). - Select Apply to set up the agent and start the services.