Proxy Application Client Installation
Learn how to install and configure the 365 business Proxy Application Client.
Requirements
Operating System
- Windows 10 or later (64-bit)
- Windows Server 2016 or later (64-bit)
Software
- .NET 8.0 Runtime
- Download Proxy Application Client Installer
Note
If you want to update your Proxy Application Client, simply download the latest version.
Your existing configuration will be retained.
Your existing configuration will be retained.
Preparation
Before you begin, please read the article What is 365 business Proxy Application? to determine the best system for installation.
Good to know
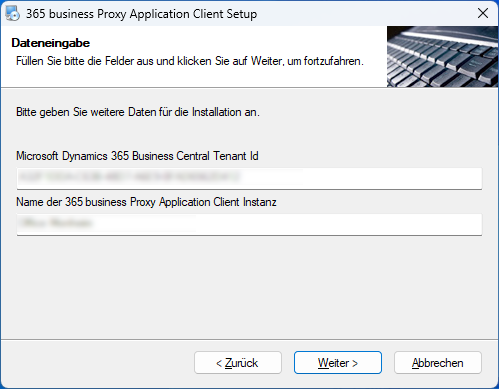
You will need the **Tenant-ID** of your Business Central environment for installation.
You can find it on the **Proxy Application Setup** page in Microsoft Dynamics 365 Business Central.
For more details, refer to the [Getting Started guide](get-started.md).
You can find it on the **Proxy Application Setup** page in Microsoft Dynamics 365 Business Central.
For more details, refer to the [Getting Started guide](get-started.md).
Installing the Proxy Application Client
Download the latest version of the client ZIP file:
Download nowSave the file to your desired system.
Extract the ZIP archive (e.g., to
C:\install).Launch the setup file and follow the installation wizard.
Enter your Tenant-ID and a unique Name for the client.
(Optional) Provide domain username and password under which the service should run.
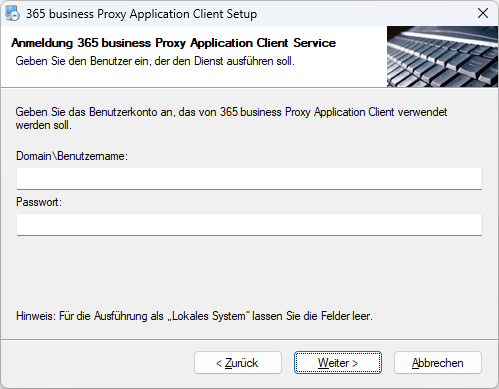 Note If no user is specified, the 365 business Proxy Application Client runs in the context of Local System.
After successful installation, the service will start automatically and be available in Business Central under Proxy Application Clients.