

SEPA Direct Debit
In this section, you will learn how to perform SEPA direct debit in Microsoft Dynamics 365 Business Central. SEPA (Single Euro Payments Area) enables businesses to make payments in euros within the SEPA area efficiently and cost-effectively. In the direct debit process, you use prior authorization, in the form of the SEPA mandate, to collect payments from your customers' accounts.
Good to know
Microsoft Dynamics 365 Business Central supports the execution of SEPA direct debits via the Payment Journals and Direct Debits. Both options are fully supported by 365 business Banking, but we recommend using the Direct Debits page.
Step-by-Step Guide - SEPA Direct Debit
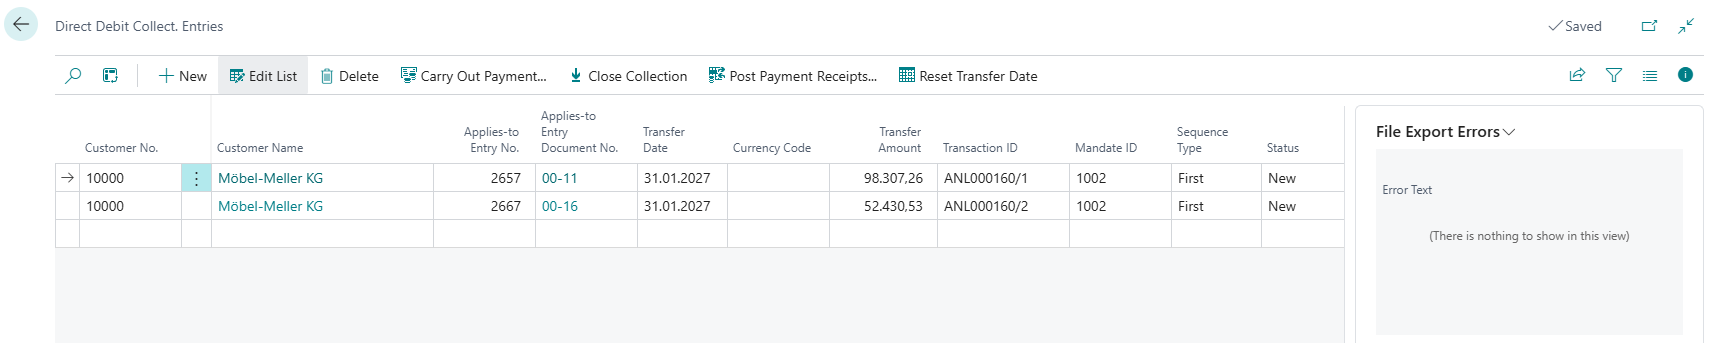
To initiate direct debits, use the Direct Debits page in Microsoft Dynamics 365 Business Central. Here, you can create new direct debits, transfer them to the bank, and post the payment receipt.
Follow these steps to initiate payments in 365 business Banking:
- Select Direct Debits in the search bar of Microsoft Dynamics 365 Business Central.
- Select New and Create Direct Debit.
- Choose the options for creating the direct debits.
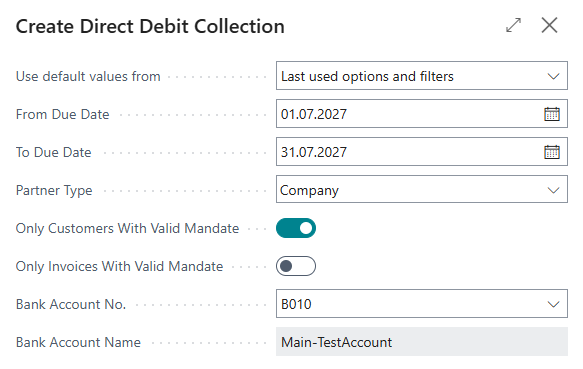
- Select OK to create the direct debits.
- Review the created direct debits.
- Select the action Process Payments to process the direct debit.
- Select Post Payment Receipts... to post the payment receipts of the direct debits.
Depending on the bank and the payment method, it may be necessary to use a TAN or another authentication method to confirm the payment. In this case, a dialog will appear to confirm the payment.
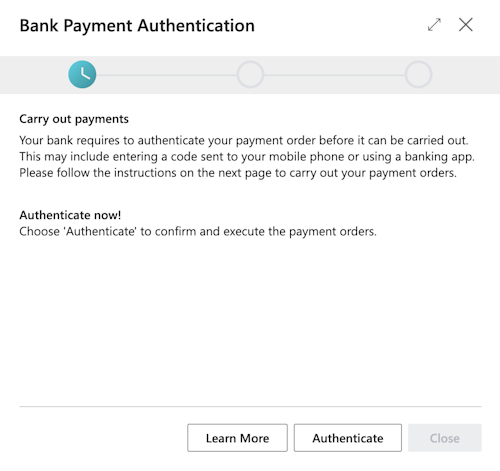
- Select Authorize to confirm the payment process.
- Follow the on-screen instructions to authorize the payment. This may include entering a TAN or confirming via a banking app.
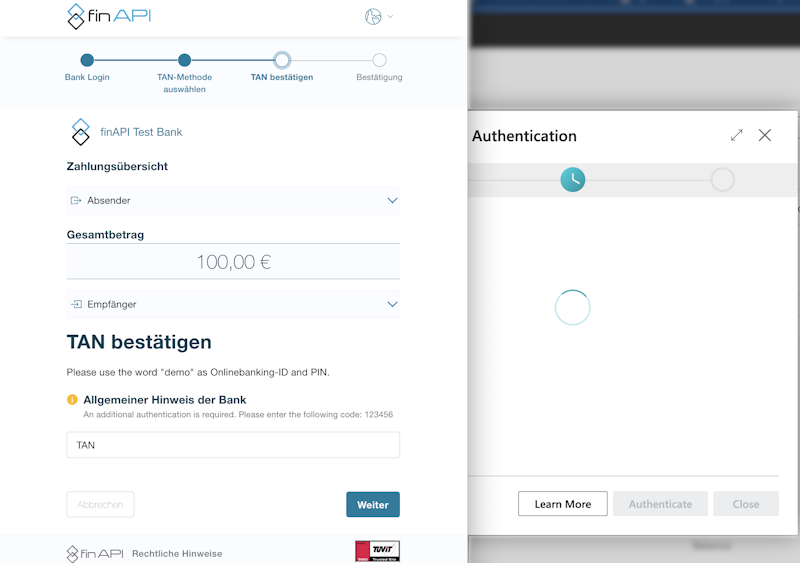
- After successful authorization, the direct debit is processed and completed.
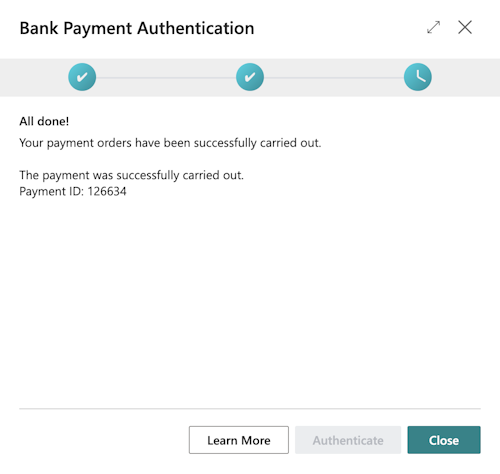
- Select Close to close the dialog and return to payment processing.
Step-by-Step Guide - Payment Journals
To initiate direct debits, use the Payment Journals in Microsoft Dynamics 365 Business Central. Assign a Bank Account and a Payment Method to the journal (see Payment Journals). The payment method determines whether it is a SEPA direct debit.
Follow these steps to initiate payments in 365 business Banking:
- Select Payment Journals in the search bar of Microsoft Dynamics 365 Business Central.
- Select an existing journal for your bank account and payment method or create a new journal.
- Select the action Edit Journal to edit the journal.
- Enter the journal lines for your payments, or use the action Suggest Payments to automatically generate payment suggestions.
- Review the journal lines and ensure all information is correct. Pay special attention to amounts, purposes, and the recipient's bank account.
- Select the action Process Payments and Post to process the direct debit and complete the posting.
- Confirm the execution of the payments and the posting of the journal.
Depending on the bank and the payment method, it may be necessary to use a TAN or another authentication method to confirm the payment. In this case, a dialog will appear to confirm the payment.
- Select Authorize to confirm the payment process.
- Follow the on-screen instructions to authorize the payment. This may include entering a TAN or confirming via a banking app.
- After successful authorization, the direct debit is processed and completed.
- Select Close to close the dialog and return to payment processing.
After confirming and executing the direct debit, the journal lines in the Payment Journal are posted. If the action Process Payments and Post was used, the posting is done automatically. Otherwise, you must manually post the journal lines using the action Post in the Payment Journal.