import { Callout } from "zudoku/ui/Callout";
# Getting Started
This quick guide explains how to install and configure the **365 business Proxy Application** in your Microsoft Dynamics 365 Business Central environment.
Test the 365 business Proxy Application free of charge in sandbox environments of Microsoft Dynamics 365 Business Central.
In addition, there is a free 30-day trial period for real and On-Premises environments without functional restrictions.
## Requirements
- Microsoft Dynamics 365 Business Central 2021 release wave 1 (version 18.0) or later
- A Microsoft Windows system (Windows Server 2016 or newer recommended) to run the [365 business Proxy Application Client](https://365businessapi.com/api/SoftwareDownload?AppId=da472ae3-fa8a-406f-bbea-c2aafd5f77d5)
- An internet connection
This guide shows how to set up the 365 business Proxy Application using the File Plugin.
For more information about other plugins, please refer to the plugin documentation.
---
## Step 1: Installation of 365 business Proxy Application
Open the **Marketplace for Extensions** in Business Central and search for **365 business Proxy Application**.
Install the app via Microsoft Marketplace.
Installation packages for your On-Premises Business Central environment can be found in our download portal.
---
### Step 1.1: Proxy Application Setup
1. Open the **Proxy Application Setup** page in Business Central.
2. Click **Authenticate** to connect your environment to the Cloud Service.
3. Copy the **Tenant-ID** by clicking on the field value.
The Tenant-ID links the Proxy Application Service to your Microsoft Dynamics 365 Business Central environment.
You will need the Tenant-ID later when setting up the Proxy Application Service.
4. Click **Download Client...** to download the [365 business Proxy Application Client](proxy-application-client-whatis.md).
---
### Step 1.2: Install 365 business Proxy Application Client
1. Save the downloaded ZIP file to the server or computer you want to use with the Proxy Application.
2. Extract the ZIP file (e.g., `C:\install`)
3. Run the setup file and follow the instructions.
4. Enter the **Tenant-ID** from the previous step and assign a **Name** for the client to identify it in Business Central.
5. *(Optional)* Enter a domain user and password under which the client should run.
If you don’t specify a user, 365 business Proxy Application Client will run in the Local System context.
---
## Step 2: Register and Activate Clients
To access Proxy Application Clients in Business Central, they must first be activated.
1. Open the **Proxy Application Setup** in Business Central.
2. Available clients are automatically discovered and listed when you open the page:
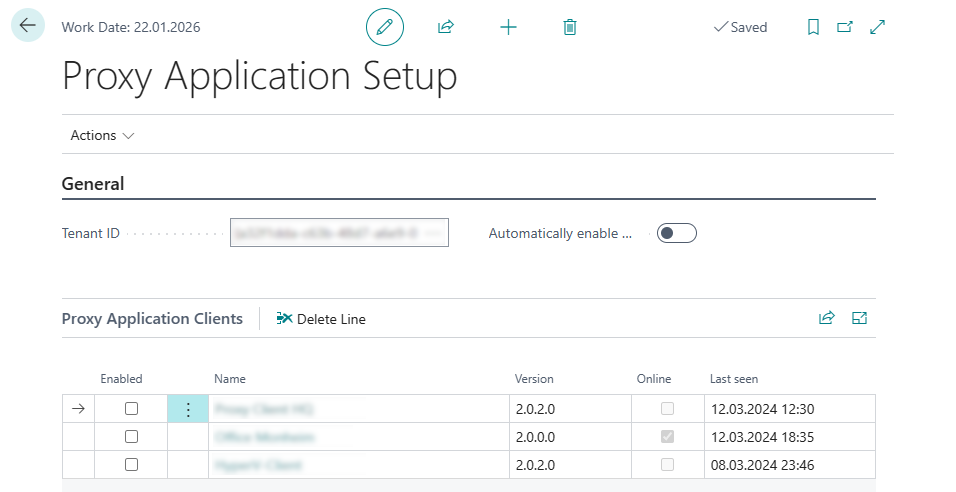
3. Enable a client by checking the **Enabled** box.
4. Click the **Name** of the client to open its card.
5. The **Client ID** is listed in the client card.
The Client ID is used to address the Proxy Application Service directly.
While it's possible to use plugin-specific resolution, this guide assumes you use a specific Client ID.
---
### Step 2.1: Install Proxy Application Client Plugins
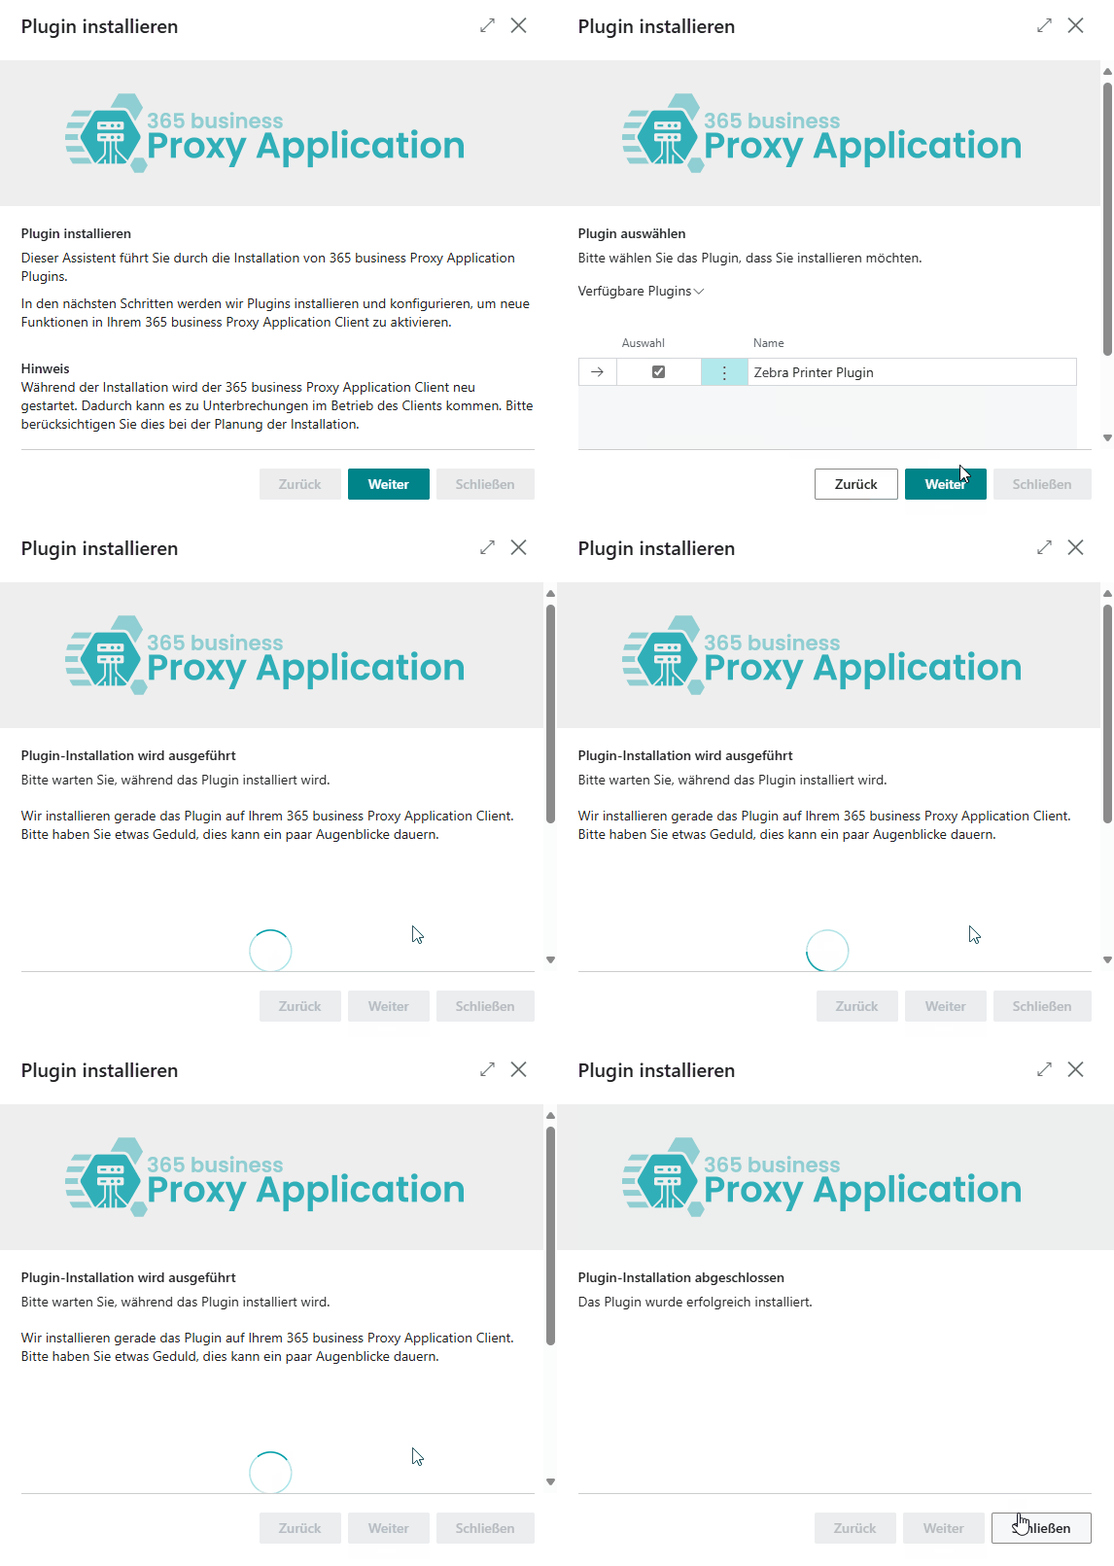
1. Open Microsoft Dynamics 365 Business Central.
2. Open the **Proxy Application Clients** page.
3. Click **Refresh** to load available clients.
4. Select the client you named earlier.
5. Click **Install Plugins**.
6. Click **Next**.
7. Select the plugin(s) you want to install (e.g., File Plugin).
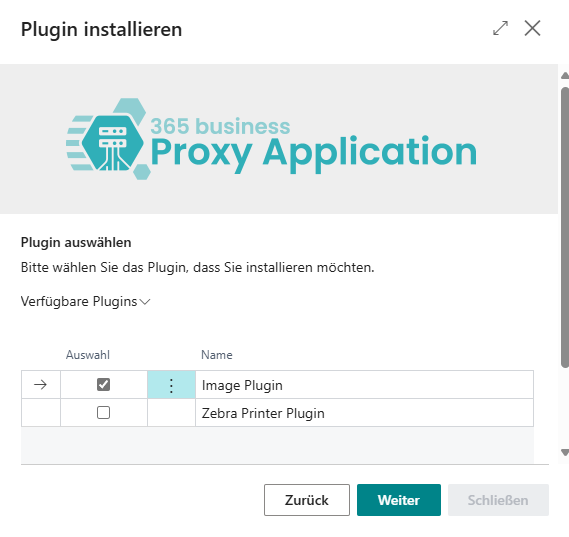
8. Click **Next**.
9. After installation completes, click **Close**.
---
### Step 2.2: Set Default Client for Plugins *(Optional)*
To simplify client selection, you can define a default client per plugin. This allows automatic assignment of clients for specific tasks.
1. Open BMicrosoft Dynamics 365 Business Central.
2. Navigate to **Proxy Application Setup**.
3. Choose **Associated** > **Standard Clients**.
4. Select the **Plugin** (e.g., File Plugin).
5. Select the **Client Name** to assign.
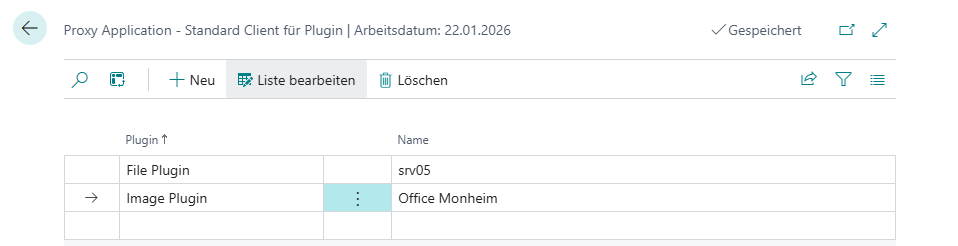
You can only select clients that already have the selected plugin installed.
---
## Step 3: File Plugin Implementation
This quick guide explains how to write a file to your local file system using the **File Plugin** of **365 business Proxy Application**.
We assume that your AL project already exists and just needs to be extended.
---
### Step 3.1: Add Proxy Application Dependency
1. Open your `app.json` manifest in Visual Studio Code.
2. Add the following dependency under the `dependencies` array:
```json
[..],
"dependencies": [
{
"id": ‘ae907ccb-e4a3-4594-9955-bd931031af8f’,
"name": ‘365 business Proxy Application’,
"publisher": ‘365 business development’,
"version": "18.0.0.0"
}
],
[..]
```
3. Execute the command **AL: Download symbols**.
---
### Step 3.2: Read and Write a File via AL
This example writes and then reads a file with the contents `Hello, World!` into/from `C:\temp\test.txt`.
You can find more detailed information in the [Plugin documentation](plugins.md).
1. Open an existing code unit or create a new AL file in which the AL code can be developed
2. Insert the following AL code:
```pascal
procedure WriteAndReadHelloWorldFile()
var
proxyApp: Codeunit "bdev.PRX Proxy Application";
file: Codeunit "Temp Blob";
filePath: Text;
sampleText: Label 'Hello, World!', Locked = true;
begin
// write "Hello World" into the text file
CreateFileInTempBlob(file, sampleText);
// set file path
filePath := 'c:\temp\test.txt';
// write file to filesystem
if (not proxyApp.PostFile(
filePath,
file
)) then
Error('Failed to write file!\Error: %1', GetLastErrorText());
Clear(file); // reset temp blob
// read file from filesystem
file := proxyApp.GetFile(
filePath
);
// compare content with expected content
if (ReadContentFromTempBlob(file) <> sampleText)then
Error('The file content does not match.')
else
Message('The file has been written.');
end;
local procedure CreateFileInTempBlob(var file: Codeunit "Temp Blob", fileContent: Text)
var
stream: OutStream;
begin
file.CreateOutStream(stream, TextEncoding::UTF8);
stream.WriteText(fileContent);
end;
local procedure ReadFile(filePath: Text): Text
var
proxyApp: Codeunit "bdev.PRX Proxy Application";
file: Codeunit "Temp Blob";
begin
// invoke Proxy Application plugin
file := proxyApp.GetFile(
filePath
);
exit(ReadContentFromTempBlob(file));
end;
```
3. Execute the function `WriteAndReadHelloWorldFile()`.
### See also
- [Proxy Application Architecture](proxy-application-whatis.md#architecture)
- [What is the Proxy Application Service](proxy-application-client-whatis.md)
- [Proxy Application Service Installation](proxy-application-client-installation.md)
- [Proxy Application Setup](setup.md)