Virtual Printer Support
The 365 business Print Agent only provides limited support for virtual printers such as Microsoft Print to PDF or Microsoft XPS Document Writer.
This limitation exists because virtual printers do not provide essential attributes like paper trays or supported paper sizes that are required in the context of Business Central.
Therefore, the 365 business Print Agent blocks the use of incompatible virtual printers and marks them as Unavailable in the printer list.
If you still want to test the functionality with a virtual printer, we recommend setting up a manually installed Microsoft XPS Document Writer (MXDW).
Since print jobs handled by the 365 business Print Agent run under the Local System account, displaying dialogs is not possible and will result in errors.
To avoid this, a virtual printer must be manually configured with a fixed output path.
Setting Up a Microsoft XPS Document Writer (MXDW)
The following is the recommended procedure for setting up a virtual printer with automatic file output:
Step-by-Step Guide
- Open Devices and Printers.
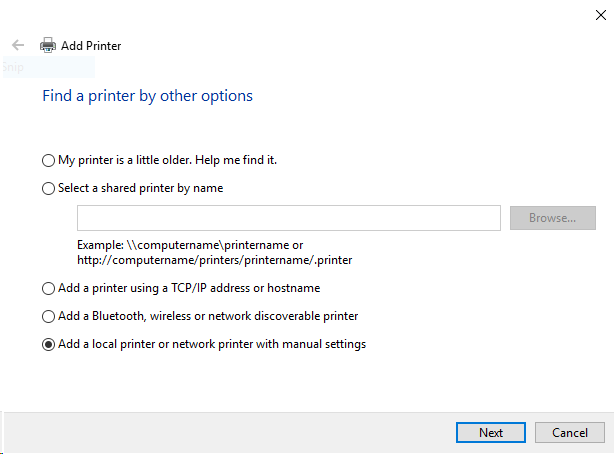
- Click on Add a printer.
- Select Add a local or network printer with manual settings
- Choose Create a new port, select Local Port as the type
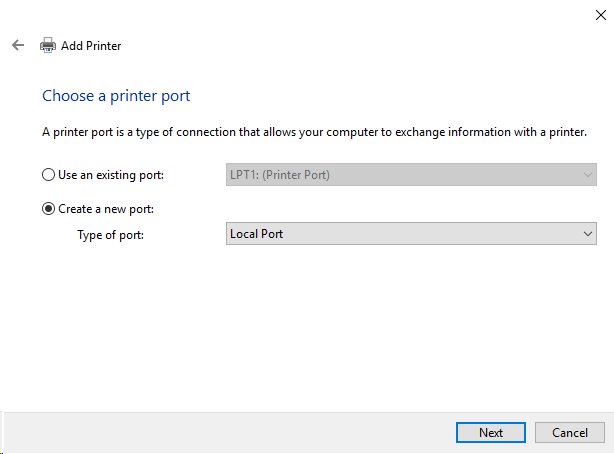
- In the Port Name field, specify the full path and file name for the output, e.g.
C:\Temp\PrintJob.xps - Select the manufacturer: Microsoft
- Select the printer: Microsoft XPS Document Writer v4

- Click Use the driver that is currently installed (recommended)
- Enter a name for the printer.
- Complete the setup by clicking Finish.
- Share this printer in the 365 business Print Agent Setup in Microsoft Dynamics 365 Business Central.
For testing purposes, you may temporarily run the service under a user account with full access to that path.
Result
After successful setup, all print jobs sent to this virtual printer will be automatically saved to the defined path.
This includes all jobs sent from Microsoft Dynamics 365 Business Central via the 365 business Print Agent.