import { Callout } from "zudoku/ui/Callout";
# Secure Print
The Secure Print feature for the 365 business Print Agent is a paid add-on.
Please check the Extension License Management (365 business development) to verify if a valid license for this feature has been acquired.
**Secure Print** is a feature of the 365 business Print Agent that allows print jobs to be securely held and only released after authentication using the Print Agent mobile app.
This is especially useful when printing confidential documents and avoiding unauthorized access.
## Setting up Secure Print
To use Secure Print, a few setup steps are required. The configuration consists of two parts:
- Setting up Secure Print users
- Enabling Secure Print in printer settings
### Setting up Secure Print Users
Secure Print users are set up by linking Microsoft Dynamics 365 Business Central users with their Microsoft Entra ID object ID.
This link is necessary to authenticate and assign the submitted print jobs correctly.
1. Navigate to the **365 business Print Agent Setup** page.
2. Select **Related** and **Secure Print Users**.
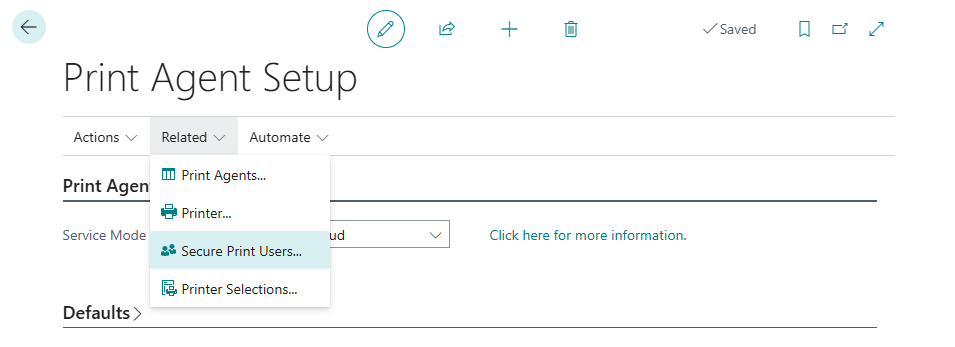
3. Select the user you want to enable Secure Print for.
4. Enter the user's Microsoft Entra ID object ID.
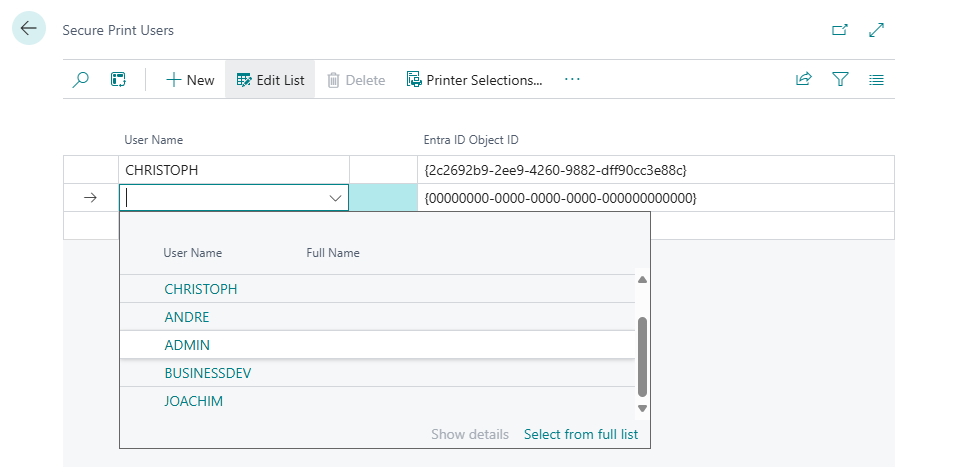
You can find the user's Entra ID object ID in the Microsoft Entra administration portal.
For instructions on how to locate the object ID, click here.
### Enabling Secure Print in Printer Settings
Once users have been configured, you can enable Secure Print in the printer settings:
1. Navigate to the **365 business Print Agent Setup** page.
2. Select **Related** and **Printers**.
3. Choose the printer for which you want to enable Secure Print.
4. Select the Printer Configuration you want to edit.
5. Disable the Printer Configuration to allow changes.
6. Enable the **Secure Print** option.
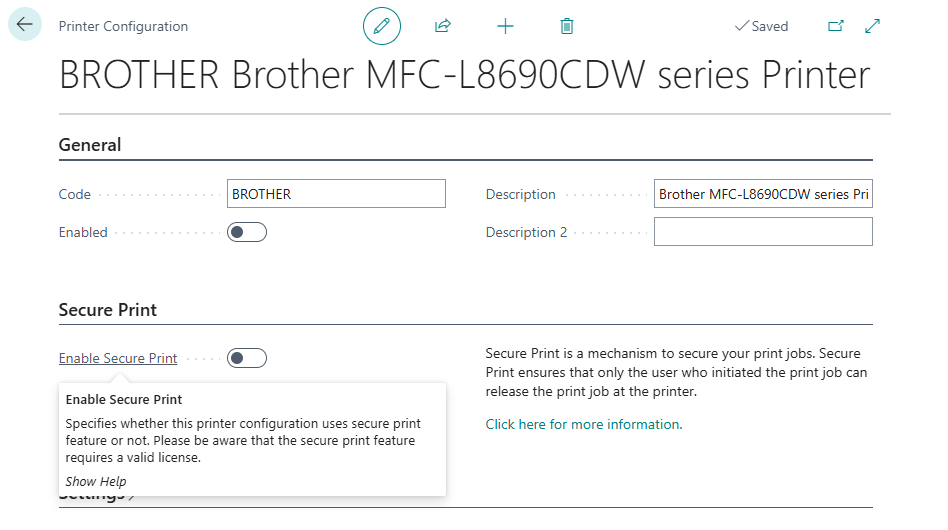
7. Reactivate the Printer Configuration.
After enabling Secure Print for a printer configuration, all print jobs will be securely held and must be released using the Print Agent mobile app.
Only users configured for Secure Print can use printer settings that have Secure Print enabled.
### See also
- [Find user object ID (Microsoft Learn)](https://learn.microsoft.com/en-US/partner-center/account-settings/find-ids-and-domain-names#find-the-user-object-id)