

Payments
Standing Order
Standing orders are regular payments that are automatically executed on specified dates. They are useful for recurring payments such as rent, subscriptions, or other regular obligations. In this section, you will learn how to set up and manage standing orders in Microsoft Dynamics 365 Business Central.

Step-by-Step Guide
- Select Standing Orders in the search bar of Microsoft Dynamics 365 Business Central.
- Select the action New to create a new standing order.
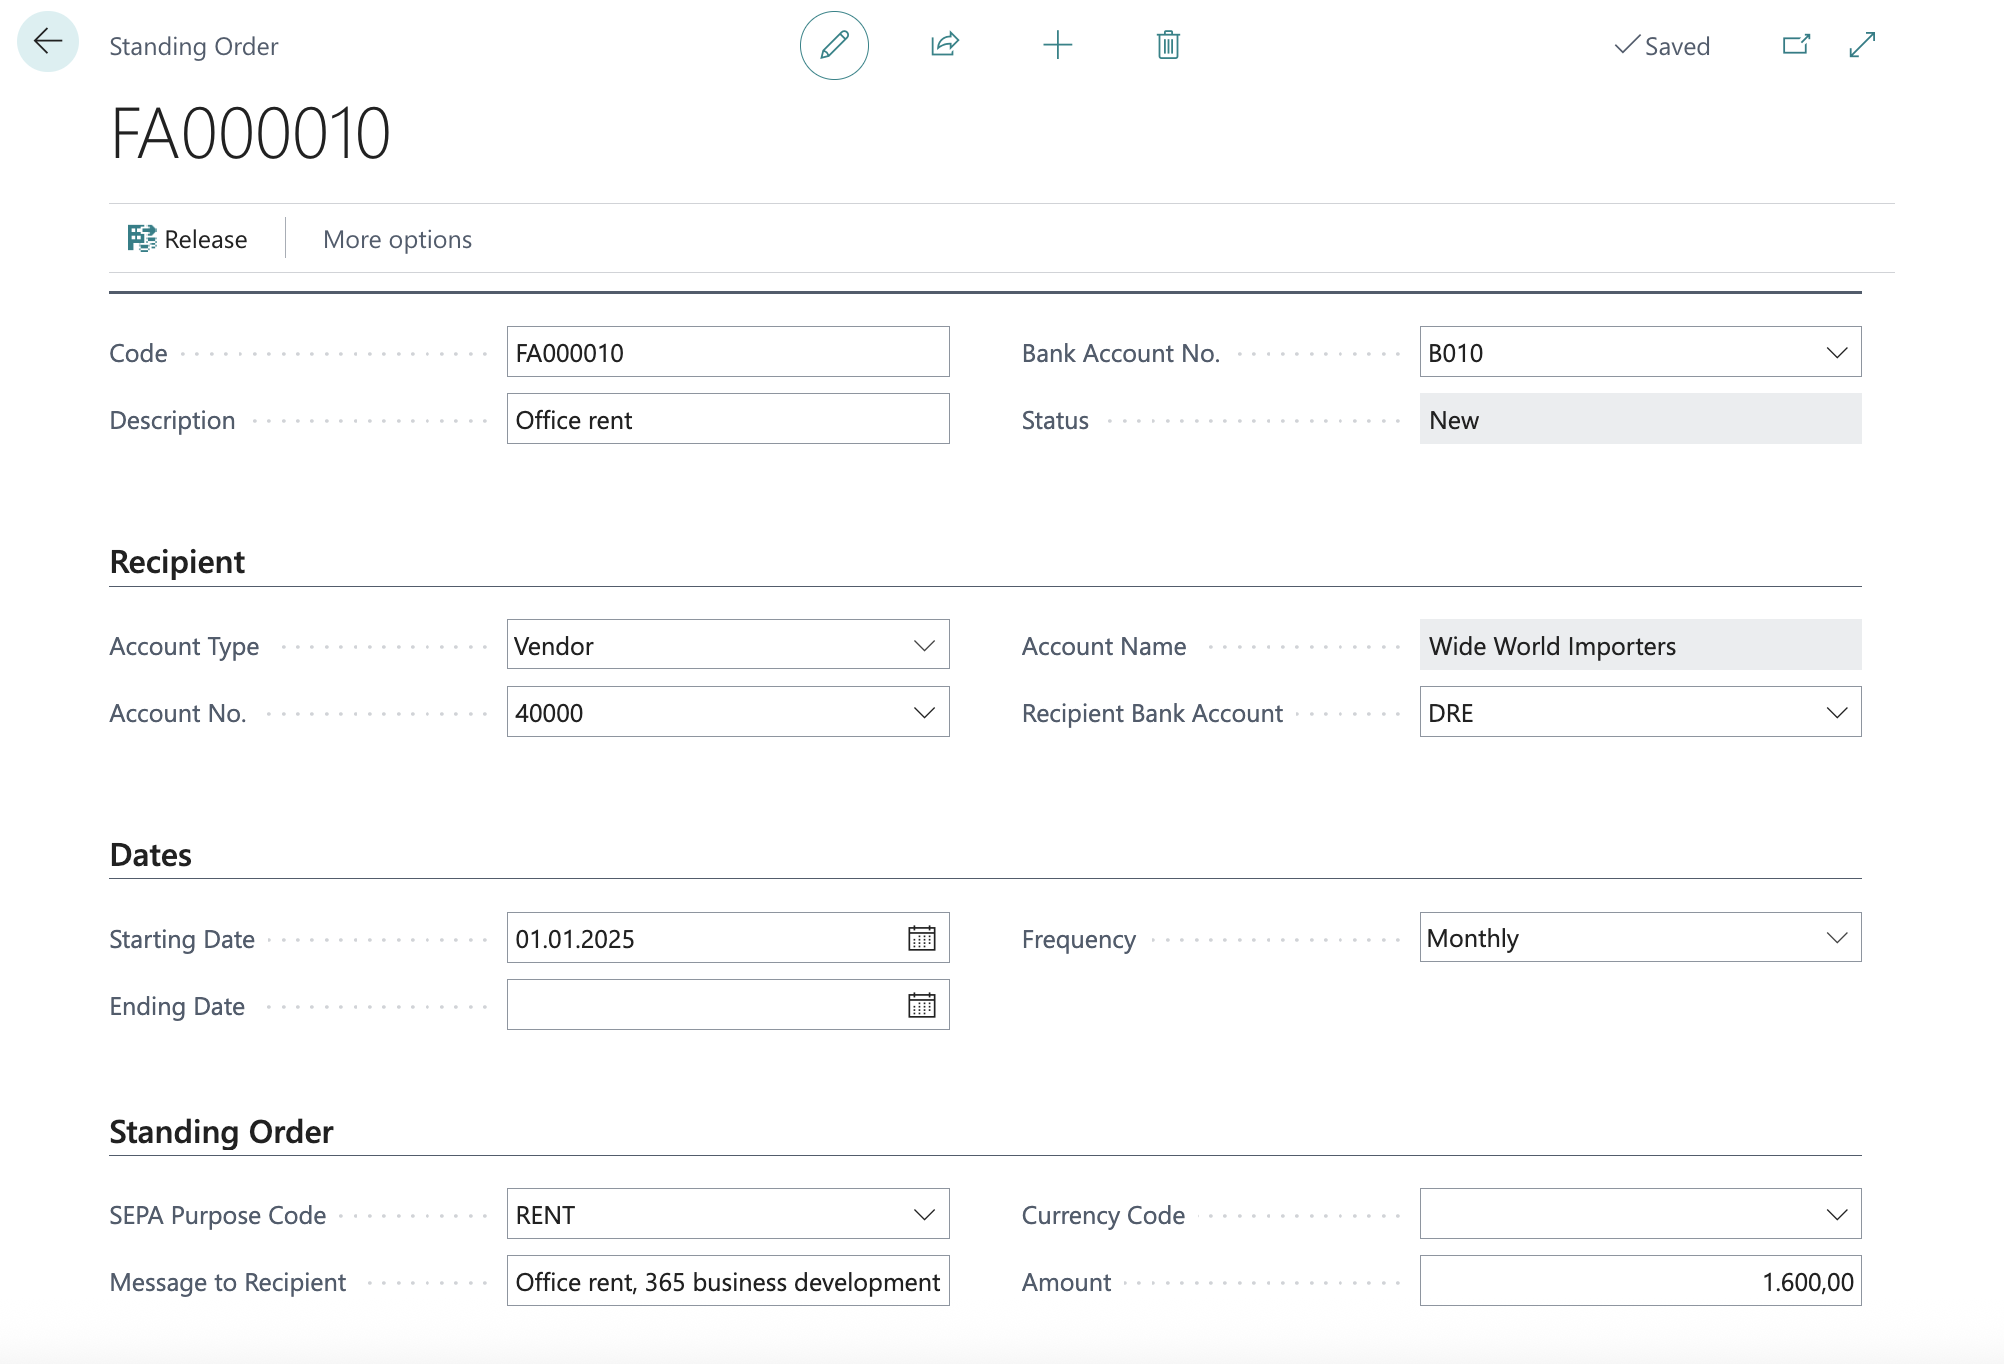
- Enter a Description for the standing order to easily identify it later.
- Select the Bank Account from which the payments will be debited.
- Select the Recipient, including the recipient's bank account, for whom the standing order is being set up.
- Set the Frequency, Start Date, and optionally an End Date for the standing order.
- Enter the Message to Recipient, the Amount, and optionally the SEPA Purpose Code to specify the purpose of the payment.
- Review the entered information and ensure all details are correct.
- Select the action Submit to send the standing order to the bank.
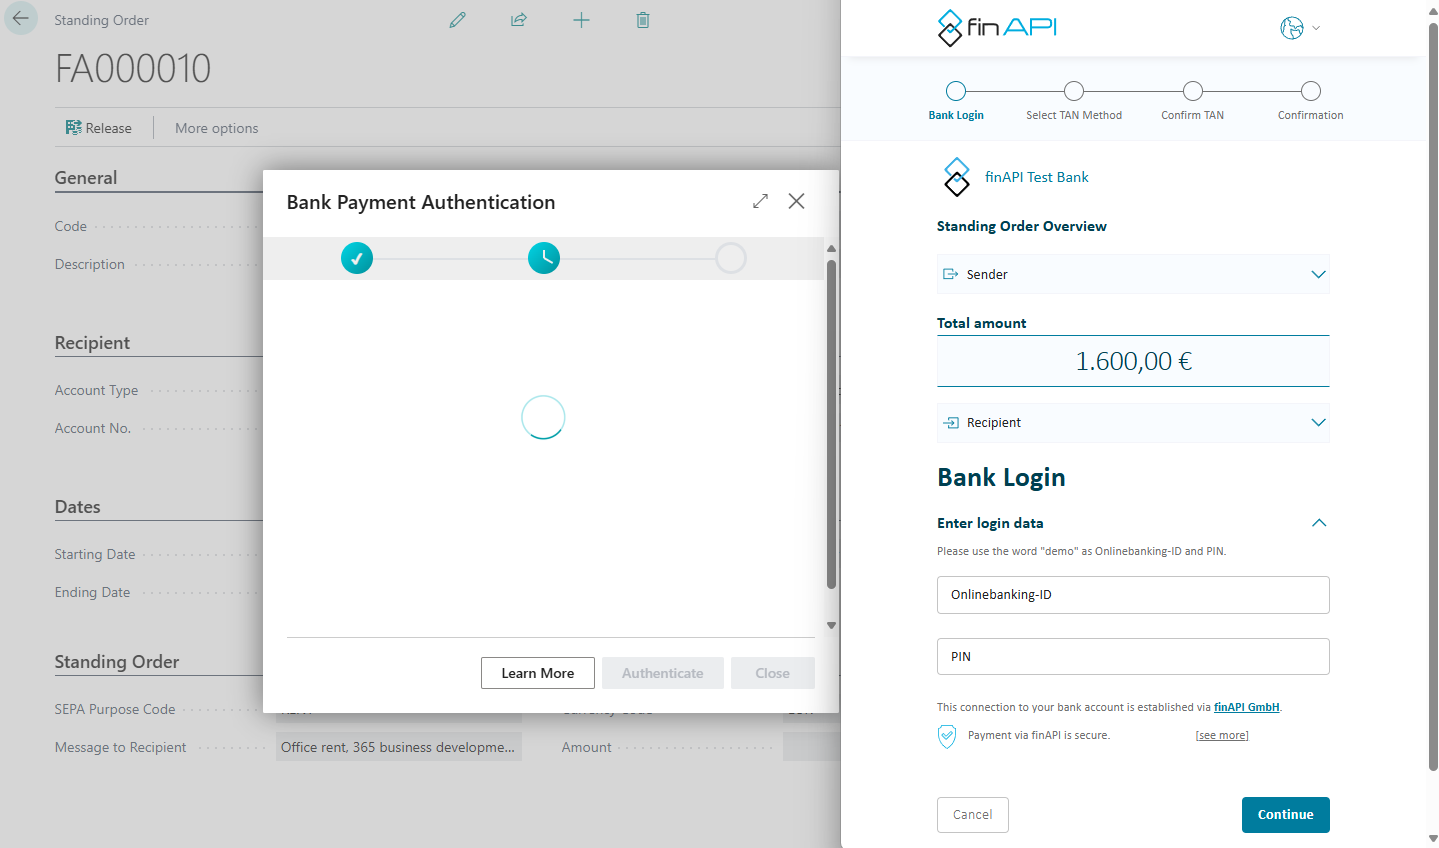
Depending on the bank and the payment method, it may be necessary to use a TAN or another authentication method to confirm the payment. In this case, a dialog will appear to confirm the payment.
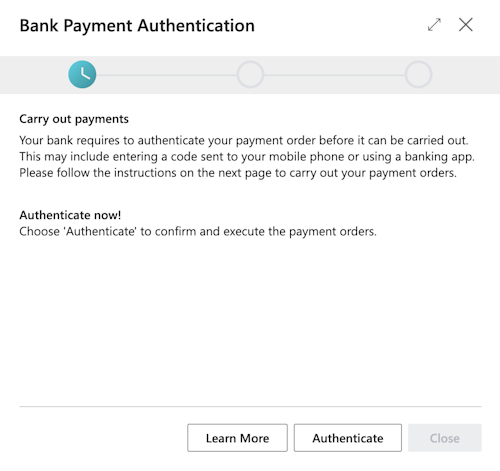
- Select Authorize to confirm the payment process.
- Follow the on-screen instructions to authorize the standing order. This may include entering a TAN or confirming via a banking app.
- After successful authorization, the standing order is saved.
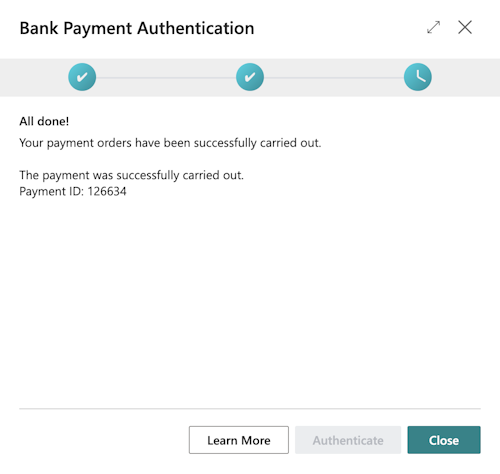
- Select Close to close the dialog.
After successful authorization and saving of the standing order, it is recorded in the system, and payments are automatically executed on the specified dates. The Status of the standing order is set to Submitted.
Last modified on