import { Callout } from "zudoku/ui/Callout";
# Payment Journal
The payment journals in Microsoft Dynamics 365 Business Central are the central place for initiating outgoing payments. A bank account and a payment method are assigned to the journal. The payment method determines whether it is a SEPA transfer, a SEPA instant transfer, or a SEPA direct debit.
Accordingly, there can be one or more payment journals for each bank account, each configured for a specific payment method. This allows for flexible handling of payments and easy adaptation to specific requirements.
## Making Payments
To initiate payments, use the payment journals in Microsoft Dynamics 365 Business Central. Follow these steps:
1. Select **Payment Journals** in the search of Microsoft Dynamics 365 Business Central.
2. Select an existing journal for your bank account and payment method or create a new journal.
3. Choose the action **Edit Journal** to modify the journal.
4. Enter the journal lines for your payments, or use the action **Suggest Payments** to automatically generate payment suggestions.
5. Review the journal lines and ensure all information is correct. Pay particular attention to amounts, payment references, and the recipient's bank account.
6. Choose the action **Process Payments** to process the payments.
7. Confirm the execution of the payments and the posting of the journal.
The payment journal also offers the action Process and Post Payments. This action combines the execution of payments with the posting of the journal in one step.
This is especially useful if you want to post the payments immediately.
## Extended Payment Suggestions
The **Suggest Payments** action creates payment lines for **customers**, **vendors** and **employees** in a single run in the payment journal.
1. Open the **Payment Journal** in Microsoft Dynamics 365 Business Central.
2. Choose the **Suggest Payments** action.
3. Specify:
- **Template Code** – the template that provides the default settings of the suggestion.
- **Last Due Date** – limits the entries taken into account; empty means no limit.
4. Confirm with **OK**. The lines are created in the journal and can be adjusted before the payments are carried out.
{/* TODO Screenshot: /assets/images/365-business-banking/ext-payment-suggestion-request.en-US.png — Suggest Payments request page with Template Code and Last Due Date */}
All further settings – scope per account type, payment discounts, vendor priority, available amount, summarization, document numbering, message to recipient and entry filters – are stored in the **Extended Payment Suggestion Template**.
If Apply Customer-Vendor Netting is active in the template, mutual receivables and payables of a business partner are offset through a pair of balancing journal lines; only the remaining amount is paid. Each run produces a netting statement, which you issue through the Print Netting Statement and Send Netting Statement actions.
For more information, see [Extended Payment Suggestions](features/details/extended-payment-suggestion.mdx).
## Posting Payments
After processing the payments, the journal lines in the payment journal can be posted. If the action **Process and Post Payments** was used, the posting is done automatically. Otherwise, you need to manually post the payment using the **Post** action in the payment journal.
## Printing the Payment Journal
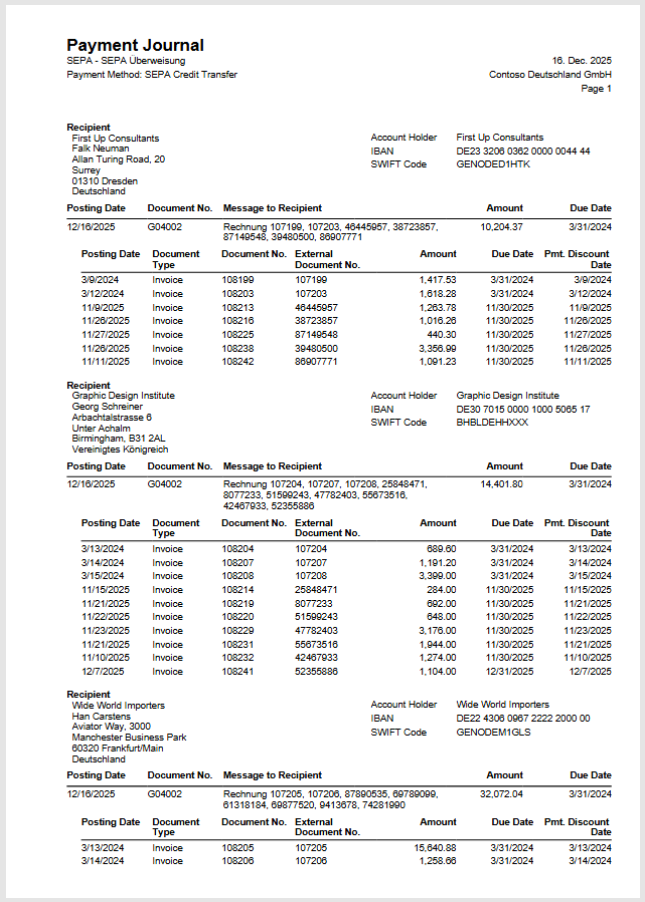
With the function to print the payment journal in 365 business Banking, users can generate the journal in a printable format. This allows users to create a physical copy of the journal that can be used for review, approval, and archiving purposes. The printout contains all relevant information of the journal, including payment details, recipient data, and the bank account to be used.
### Step-by-Step Guide
1. Select **Payment Journals** in the search of Microsoft Dynamics 365 Business Central.
2. Select an existing payment journal.
3. Choose the action **Print** in the menu bar.
4. Select **Print Approval**, if the printout should include a section for signatures to approve the payments.
5. Choose **Print** to start the printing process.